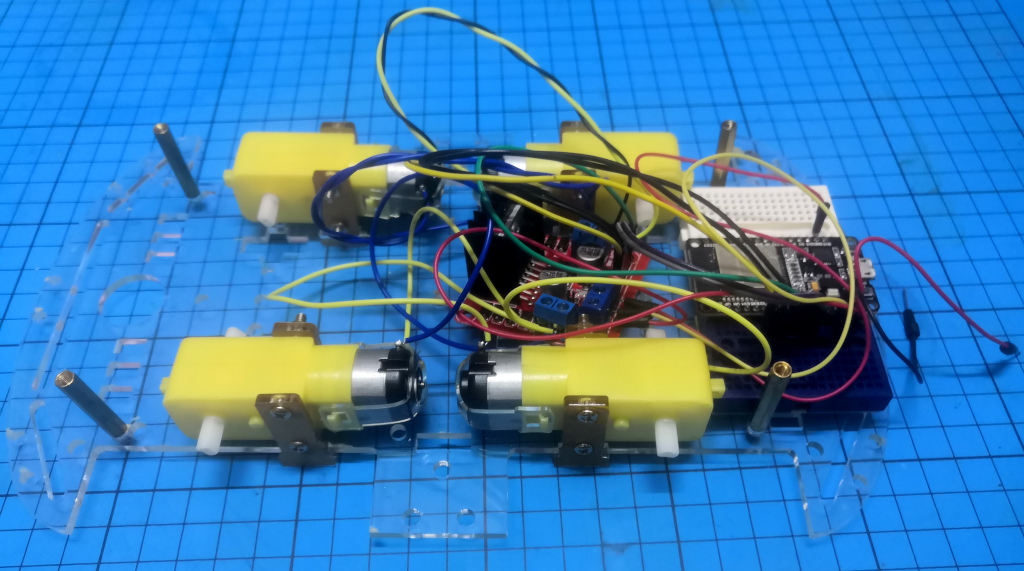
Hopefully yours looks neater than mine!
This first step in learning to code our robot is a little bit tricky, and we need to set up some software first.
Today we're going to.
Hopefully yours looks neater than mine!
Next we need to set up everything we need for coding, and sending (uploading) that code to Robby.
First we need the Arduino IDE, which can be downloaded from the Arduino [website](https://www.arduino.cc/en/software).
Make sure you download the correct version for your computer, Windows (not "Windows app") if you're using Windows, and Mac OS X if you're using a Mac.
When installing the IDE, make sure you click "yes" and/or "agree" to everything so that everything that is needed is added.
Once the IDE is installed we need to add a plugin that allows us to program our special, ESP32 microcontroller.
Instructions to do this can be found here
Finally we can click Tools->Boards and choose the "ESP32 Dev Kit" and Tools->Port to select our USB connected device.
    void setup() {
        // put your setup code here, to run once:

    }

    void loop() {
        // put your main code here, to run repeatedly:

    }
This is the basis of our Arduino code. "setup()" and "loop()" are functions, when they are run, everything between their curly braces "{}" is run.
When the ESP32 is turned on, setup() will be run once. After that loop() will be run again and again so long as the power is on.
Let's test it with some actual actions.
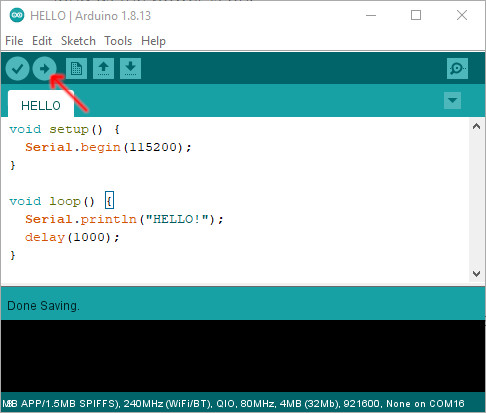
    void setup() {
        Serial.begin(115200);
    }

    void loop() {
        Serial.println("HELLO!");
        delay(1000);
    }
So we've added three new lines, let me explain them.
Serial.begin(115200);
This creates a "serial" connection across the USB cable between the ESP32 and your computer.
115200 is the speed, or "baud rate". We'll need this in a minute.
Serial.println("HELLO!");
This "prints", or sends the message through the serial link.
We need to put our "HELLO!" in "" quotation marks, otherwise Arduino will try and understand this, and it doesn't understand "hello".
delay(1000);
Finally we run a delay for 1000 milliseconds (1 second). If we don't have this we'll be sending thousands of HELLOs every second.
Now we just have to send the code to our ESP32 and listen for the message.
This creates a "serial" connection across the USB cable between the ESP32 and your computer.
115200 is the speed, or "baud rate". We'll need this in a minute.
Serial.println("HELLO!");
This "prints", or sends the message through the serial link.
We need to put our "HELLO!" in "" quotation marks, otherwise Arduino will try and understand this, and it doesn't understand "hello".
delay(1000);
Finally we run a delay for 1000 milliseconds (1 second). If we don't have this we'll be sending thousands of HELLOs every second.
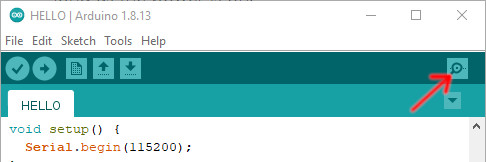
Now we can send the code by pressing the UPLOAD button.
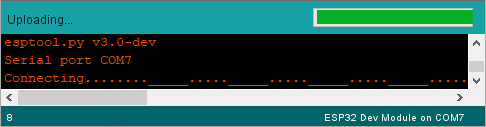
If you get stuck like this, hold down the "boot" button on the ESP32
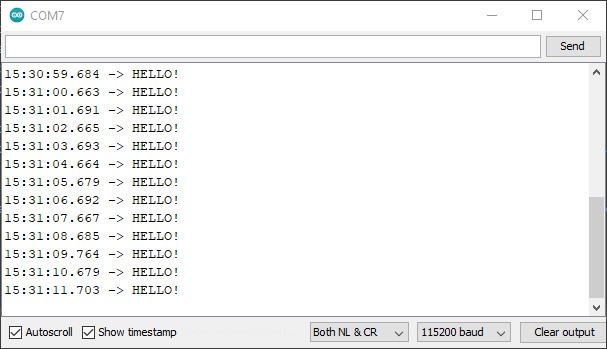
Now the very last thing we need to do is listen for Robbys message.
To do that we click on the Serial Monitor button.
Now we just need to set the BAUD RATE down the bottom of the page to 115200 like we did in our code earlier and we should be getting Robby's greetings.